This is a to be continued section for right now..so bare with me.
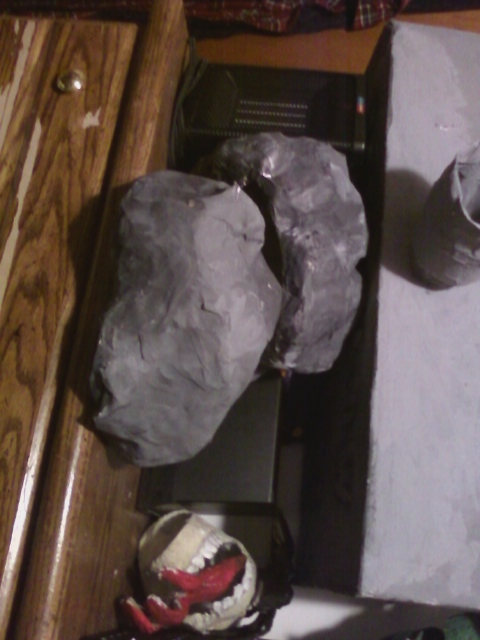
I made the facehuggers and eggs out of cardboard and recycled cardboard. I added texture using Great stuff crack foam and also paper mache clay (paste, joint compound and toilet paper).
To start the alien eggs...
1. you need two circles for a top and base. This is depending on the size that you will want. If you want small eggs, you can use a balloon, but if you want them movie quality (which is between 2 1/2 to 3 feet) you will have to build a structure yourself. Yep, that's right, no taking the easy way out this time.
2. You will then need some thick strips of cardboard. You are going to attach the cardboard strips to form a box shape to the circles. They will resemble a dumbell kind of shape. (Above) It doesn't really matter how big the box is its to support the egg. Paper Mache can tend to be really heavy when multiple layers are added.
3. Cut some random strips of cardboard. I made mine about 1 1/2 inch wide, and various lengths. I used scrap cardboard for this. Attach the strips as seen below. Bend the cardboard strips to form a rounded shape.
I attach a strip to the top piece and a strip to the bottom piece and then glue them together in the middle. This, in my opinion, helps to shape the egg shape better. Refer to photos below for example.
Now take some scrap pieces of cardboard and attach each strip to each other as seen in the photos. This will help stabilize the egg structure. When you start putting on the paper mache strips (newspaper dipped in a paste, usually made of flour and water. I use 1. cup flour to 1 cup water and i add a couple squirts of antibacterial soap into my mix to help prevent mold or bacteria from growing) the layers can get quite heavy so you need to make sure to have a sound structure so they paper mache doesn't fall into the gaps.
This is a basic egg structure. Now is when you must decide whether or not your egg will be hatched or not. If it is not hatched then create a top piece to bring the egg to a head. (Photo to come) If you want the egg hatched, then you need to create the open flaps.

Above is a photo of the egg frame that is posed hatched. You out petal shaped cardboard pieces and attach to the top of the egg using masking tape and hot glue.


Next, you want to paper mache the entire egg, keeping in mind that that the more layers you add you must allow dry time in between or the paper mache will fall through the form, also this allows for even drying and will prevent risk of mold. Once the paper mache is dry, I use either a black sharpie, marker or even left over spray paint to map out where I want my egg texture to go.

To create the texture, I take some straws and cut it into 2 inch pieces and then I tape them together. My paper mache clay is a mixture of toilet paper, joint compound, and paper mache paste. I mix a big batch of clay at a time and keep it in my refrigerator in a bucket. I use 1 whole package of cheap toilet paper from Walmart, it comes with 6 rolls, I soak them in water (You can either remove the roll first and keep it for other uses or just soak the entire thing in water then remove the roll after) and crumble the toilet paper into pulp, which happens very easily. Then I remove the pulp from the water, you want to remove or strain as much of the water out as possible. Then I add the paste (1 cup water to 1 cup flour add antibacterial agent salt, bleach or antibacterial soap) 6 cups. Then i begin adding the joint compound. I have never really measured the joint compound, I sort of wing it by feel. In my opinion you want the clay to feel like a not so moist meatloaf mix. This is the image I get in my head every time I make this, haha.

Apply the clay onto the completely dried egg base and then smooth over with a brush dipped in paste. This helps the application process go a lot smoother. Be careful when applying the clay as to not apply to thick of a layer because the clay may cause the paper mache to rip and then you will have to patch a whole. which isn't hard, you just patch with paper mache strips and let dry. Using a box fan or two for the drying process is really helpful. If it a bright, sunny day outside, take your box fan or fans and put them outside in around your egg for fast drying. Then I take the straw piece I made and I make the texture on the clay.

Once this is dry, I take great stuff foam and add details onto the egg. Great stuff is an awesome asset to your paper mache tool collection. It expands to fill dead space or it can be use to shape those hard curves or you can use it for detailing. Remember to let great foam dry completely before painting
You can paint the egg whatever color you wish, I chose to paint the texture detail a dark chocolate brown and the great foam is painted black then the egg is painted a dark gray, that has been muddied with the brown. The top of the egg gets a black circle to show that the egg is hatched and then the petals are painted a flesh color. It is really your choice on how to paint it. Watch the movies to get inspiration. Once the egg is painted and dried completely, I then brush on a coat of Spar Urethane. This will waterproof the egg, just make sure to get it into all the nooks and crannies.


